With the news that Windows 7 support will be ending soon, you might have just upgraded your device to Windows 10 for free. Or, you might have recently purchased the best laptop for you running Microsoft’s latest operating system.
Moving to and learning to use Windows 10 might seem daunting, but the operating system features an intuitive user interface and some familiar features from older versions of Windows that will make you feel right at home.
We’ve put together a nifty little guide, helping you learn how to use — and ease your way into Windows 10.
How to use the Start Menu and Live Tiles
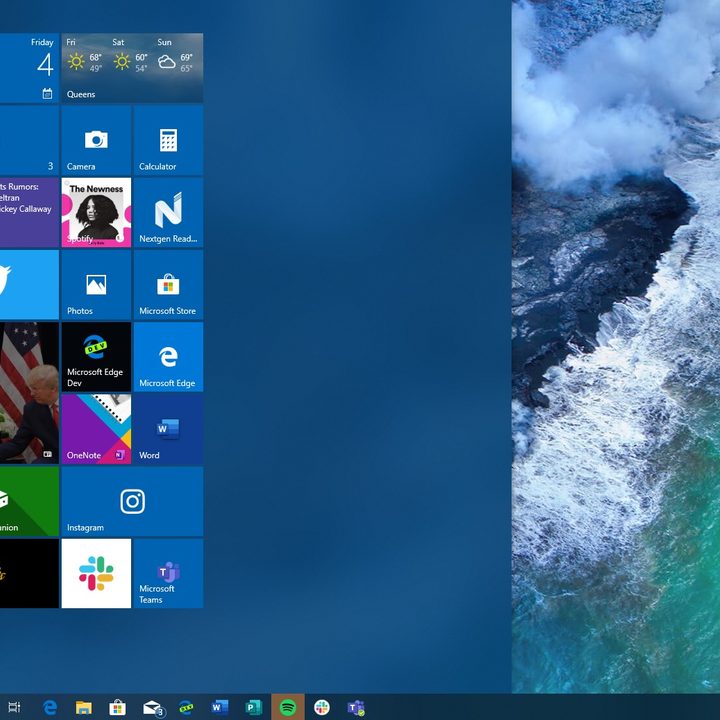
One of the first things to learn how to use in Windows 10 is the Start Menu. Compared to Windows 7, the Windows 10 Start Menu is much more improved. There are a couple of things you need to know about it — the layout, features, and ability to “pin” apps.
First off, running alongside the left side of the Start Menu in Windows 10 is your list of apps, and where you want to go when you’re ready to launch a program. Apps in Windows 10 can be installed via the Microsoft Store (similar to the iOS App Store,) or via classic installers (like for Google Chrome.)
Anyway, this area is a bit similar to Windows 7, except there is a new ability to “pin” these apps to the right side of the menu itself for quicker access. Additionally, similar to the search box in Windows 7, you also can start typing anywhere inside the Start Menu while it’s open to find an app or setting. And, if you want the Start Menu to get bigger or wider, you also can put your mouse cursor along the top and drag it upwards or to the side.
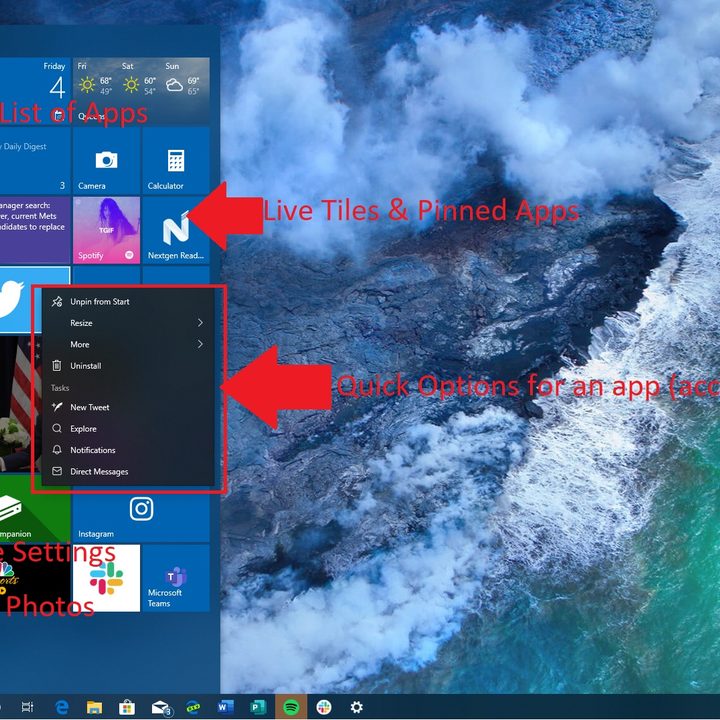
“Pinning” is one of the improved features of the new Start Menu introduced in Windows 10. Simply right-click the name of your app you want to pin, and then choose Pin to Start. This will then create what is known as a “Live Tile.” You’ll see the app appear in a “Tile” form, and you can click to launch it, but also observe quick information from it at glance. You even can resize it by right-clicking and choosing Resize.
There are a couple of sizes to choose from, and you can always move the app around the menu by long clicking it, and dragging where you please, or remove it by right-clicking and choosing Unpin from Start. Some apps will even have quick options when you right-click the Live Tile, such as the Twitter app’s ability to create a new tweet.
Next up, there are some other important areas of the Start Menu to take note of. Running along the bottom left side are some icons for quick access to common Windows features.
You’ll notice your profile picture, followed by an icon for your documents, and pictures. There’s also another icon to quickly access the settings app. Finally, there is the power icon on the bottom right where you can shut down your PC.
How to use the Taskbar
Second on the list in learning how to use Windows 10 is the Taskbar. This area is significantly improved when compared to Windows 7. We’ll be taking a look at it from left to right.
Starting on the left side is the Start Menu button. Next to that, is an icon for the search bar, which is how you can find your apps, settings, or documents. You’ll then see an icon for Cortana, which as we’ve explained before, is the digital assistant in Windows 10.
Next to Cortana is the icon for Windows Timeline. Again, as we’ve detailed in a separate guide, this is an area where you can click to see all your activities for the day, and from across your devices. With the October 2018 Update, Windows Timeline is where you’ll also find the ability to create virtual desktops.
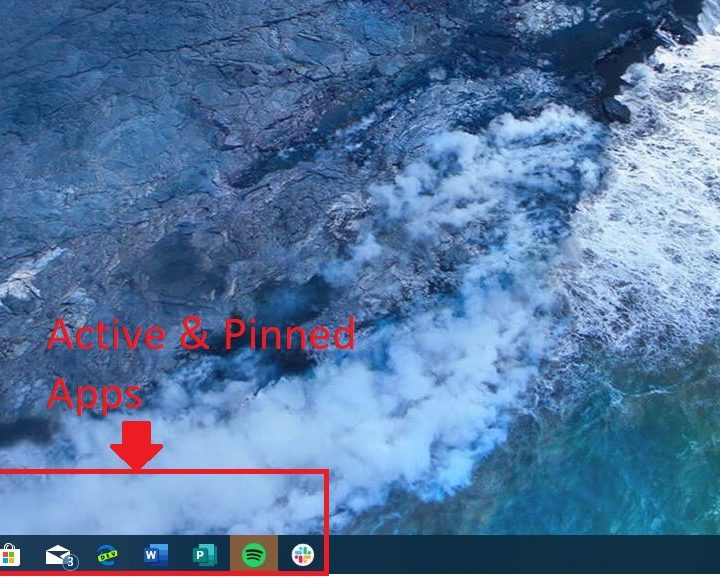
Moving along, you’ll then find the apps which have been pinned to the taskbar. You can pin an app to this area by right-clicking it in the Start Menu and choosing Pin to Taskbar. You’ll also see a list of open apps, Active apps will have have a blue indicator line underneath to let you know it is open.
Finally, you’ll arrive at the far right of the Taskbar. Here, you’ll see some icons for the system status. This includes the battery, volume levels, and Wi-Fi. If you’re on a newer version of Windows 10, you’ll also notice a pen icon, which is where you can tap to access some of the inking features in Windows 10.
Finally, there will be a hub for the time and date, which you can click on to see a mini-calendar. Then, next to that is a quick link to summon the Action Center, which we describe next.
How to use Action Center
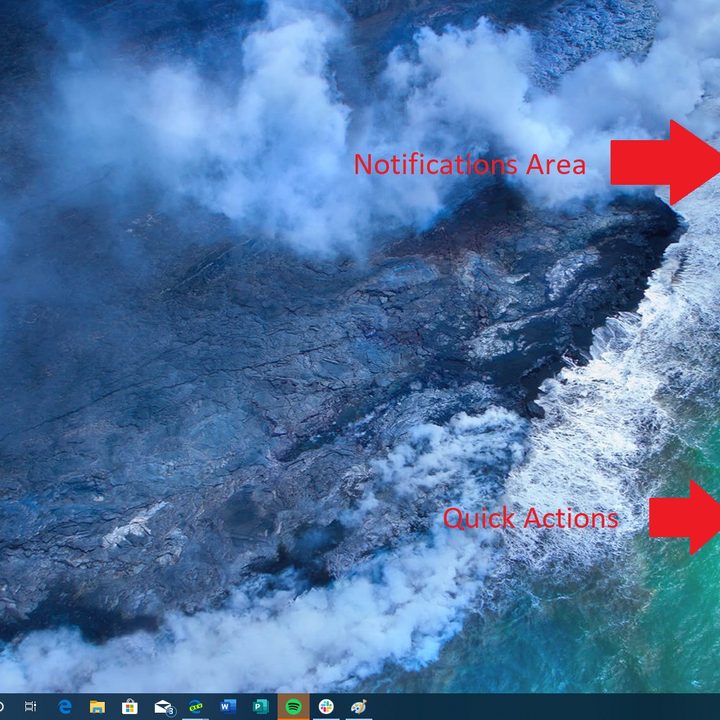
The third step in learning to use Windows 10 is learning about the Action Center. Accessed by clicking the icon on the far bottom right of the screen, Action Center is home for all your Windows 10 notifications and quick settings. You can also access it by clicking the Windows Key and A.
After you open the Action Center, you’ll notice the top area. Here is where you’ll get notifications for apps like Twitter, Facebook, or Slack. There are ways you can control notifications if you don’t like them.
Under that, is an area for what Microsoft calls “Quick Actions.” These are icons for common Windows settings or features. You’ll find options for entering tablet mode, locking the rotation of your device, going to the settings, turning on nearby sharing, as well as Bluetooth, Wi-Fi, VPN, and other settings. You can always change the order of these by right-clicking it and choosing edit quick actions.
Finally, on the bottom, is a slider for the brightness of your screen. This was introduced with the Windows 10 May 2019 Update, so you might not see it if you’re not running the latest version of Windows 10.
Try out some of our other Windows 10 tips and tricks
Once you’ve learned how to use the Start Menu, Taskbar, and Action Center, you’re pretty much a master of Windows 10. Not much else is different from other versions of Windows. Opening, closing apps, and using the File Explorer are all pretty much the same.
There’s still quite a bit more you can do, however. We have guides on how you can use keyboard shortcuts, take a screenshot, customize Windows 10, fix common issues, and more. Check out our complete topic hub on Windows 10 for more information.