Buying a camera with an interchangeable lens is an exciting experience, but it can also be overwhelming. Whether DSLR or mirrorless, these cameras offer superior image sensors and a bevy of features and adjustable settings. Even entry-level models have a confusing number of buttons and controls. Choosing a camera like this is not just about resolution, dynamic range, or other objective metrics of image quality, but about being able to achieve a specific effect or creative vision.
To help you learn more about your new camera and its functions, we’ve put together this guide explaining what each button on your typical DSLR’s body and lens does. Exact placement of these buttons varies between models, brands, and camera type, but they’re usually situated in the same general location and offer similar functionality. Learning the layout of one camera — in this case, a Nikon D5600 with a retractable kit lens — will help you better understand other models, as well. Read on to find out more.
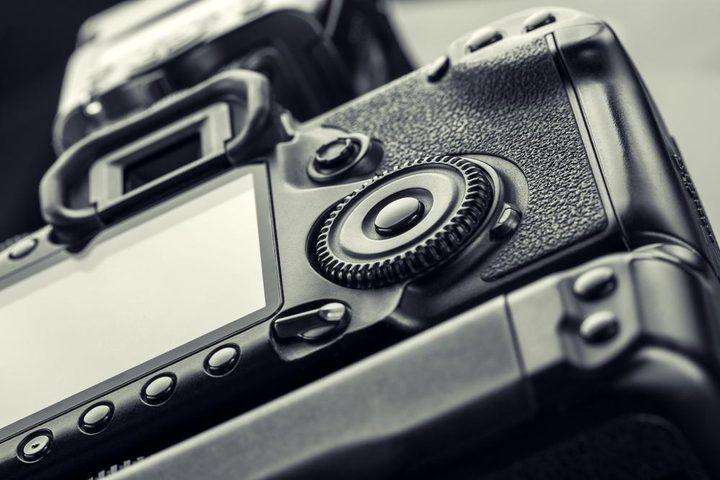
The top of the camera

The top of the camera is usually where you’ll find the most commonly-used controls. Some cameras are chock-full of buttons and dials on top, but the D5600 keeps it as simple as possible with just the essentials.
Video start-stop button — Don’t press the red button! Unless you want to shoot video, that is. This button may show up in a different position on your camera, but it is likely still decorated with a red dot. Some cameras forgo a separate record button and instead use the regular shutter button, along with a movie mode on the mode dial, for shooting videos.
Power switch — This turns the camera on and off. Nikon power switches typically encircle the shutter release button, but many other brands will put this switch elsewhere on the body.
Shutter release button — Press this button to take a picture! It’s almost always located in the same position on all interchangeable lens cameras.
Exposure compensation-aperture button — Most entry-level DSLRs make do with a single command dial which, by default, will control the shutter speed when in manual mode. If you want to control aperture, you need to hold down this button. If not in manual mode, this button allows you to adjust exposure compensation — that is, make the image brighter or darker while still letting the camera make its own decisions about which settings to use to achieve that.
Mode dial — This sets the camera to your desired shooting mode. The standard modes are Program, Shutter Priority, Aperture Priority, and Manual (denoted by the P, S, A, and M positions on the dial). Most cameras, especially entry-level models, will also have a “green box” automatic mode, which is basically fool-proof and will even raise the pop-up flash automatically when needed. A no-flash automatic mode — located directly below full automatic, at least in our example — keeps all settings in automatic, but will disable the pop-up flash when you don’t want to use it. Scene modes contain automated presets for capturing landscapes, portraits, and sports, while Effects modes usually offer different digital enhancements, like selective color.
Live view switch — Some cameras have a switch, others a button, but this locks the mirror in a DSLR, blocking the optical viewfinder and allowing you to preview your image directly on the LCD screen. This has limited use for still photography, but you must be in live view to shoot video. Mirrorless cameras are always in live view, so they won’t have this switch. However, if you have a mirrorless camera with an electronic viewfinder, you will have a button to change from the viewfinder to the rear screen.
Command dial — This lets you adjust shutter speed and, when the exposure compensation-aperture button is held, aperture. Most cameras also make use of the command dial for navigating menus or controlling other context-sensitive functions (like ISO or white balance). While the D5600 and other entry-level models have a single command dial, higher-end cameras often have two or even three, allowing for shutter speed, aperture, and sometimes ISO to be adjusted on dedicated dials.
Lens and side of the camera

Generally, buttons placed on the side of your camera won’t be for commonly-used functions. There are some interesting controls on the D5600, however, that make it worth investigating.
Flash button — In any of the “advanced” exposure modes (P, S, A, or M), this button will trigger the pop-up flash. Its location may vary from camera to camera, but the “lightning bolt” symbol is universal, so you’ll always be able to find it. The icon next to it is the flash symbol, plus the exposure compensation symbol. Holding this button will let you adjust flash exposure compensation, allowing you to adjust how bright you want the flash to be.
Function button — Some cameras have a slew of these. Function buttons are useful because they can be programmed to do whatever you want. If there’s a feature of your camera that’s buried in the menu but you’d like to be more accessible, chances are you can assign it to a function button.
Zoom ring — Usually the larger of the lens rings, turning the zoom ring zooms the lens in or out.
Focus ring — The smaller of the lens rings, rotating this ring allows you to adjust focus — but only when autofocus is turned off. On an entry-level lens like this one, you’ll notice the focus ring is particularly small. Lenses oriented toward professionals will often have larger focus rings owing to the fact that experienced users are more likely to use manual focus than beginners.
Lens retract button — Retractable lenses are becoming increasingly popular as they are more compact than non-retractable models. You must press this button to initially “zoom” the lens into its operational position, and again to retract it when you’re done shooting.
Lens release button — Press this button to unlock the lens mount and detach the lens by rotating it. You don’t need to press it when mounting a lens.
Drive mode button — This lets you control the camera’s drive mode, allowing you to take a single shot, shoot continuously, or use a countdown timer. This button is in a pretty unique position in our example, but most manufacturers will place it on the back or top of the camera. Nikon’s designers, however, likely needed to make use of that negative space, so they put it here. Like the flash symbol, the icons used for continuous drive and the timer are universal, so you’ll be able to easily identify these on other cameras. Keep in mind that many cameras won’t have a dedicated button for these features, however, meaning they will live within the menu somewhere.
The back of the camera

Well, this looks like a mess! But don’t worry, most of the controls here are pretty self-explanatory. Much of what you’ll find on the back of a camera is related to menu navigation and playback, although a few of these buttons are useful during shooting, too.
Menu button — Like you may have guessed, this brings up the camera’s menu, where you can change image quality, autofocus settings, and everything else about your camera. Note: If you’re in “green box” auto mode, some menu options may be unavailable.
Diopter adjustment — On cameras with viewfinders, the diopter adjustment lets you focus the viewfinder. If everything looks out of focus when you hold the camera to your eye, even when autofocus is turned on, the problem may lie with the diopter. So before you return your lens for a refund, play around with this adjustment. Mis-focused diopters are a common source of frustration for first-time DSLR buyers, but, fortunately, the fix is often very simple.
Info button — While shooting, pressing this button will cycle through the camera’s various information displays. During image playback, it can display metadata, a histogram, and other pertinent information about the photo at hand.
Autofocus-autoexposure lock — When using autofocus and autoexposure, holding this button down will lock those settings, even if you move the camera. This isn’t often used by beginners, but it is beneficial for more advanced shooters who can use it to take several shots with different framings while ensuring all remain focused on the same point and exposed identically.
Image playback button — Press this button to review images (and videos) on the LCD screen. Pretty simple, no?
i button — Nikon really does call this the “i” button — probably because it already has an “info” button on its cameras. Many other brands have a similar button, usually denoted by a “Q,” for “quick menu.” Pressing this button brings up a set of functions on the camera’s LCD screen, which can be controlled directly. This can be useful for adjusting ISO, white balance, and drive mode settings on cameras that don’t have dedicated buttons or dials for said features.
OK button — This is used primarily for selecting menu items, but on some cameras, it will also center the active focus point when using single-point autofocus.
Multi selector — Although this may be known by a different name on other brands, most cameras incorporate some sort of four-way controller like this. Beyond using it for navigation, many manufacturers will map shooting functions to each direction. This can also be used to move the active focus point in single-point AF mode, although some cameras will have a separate, dedicated control for this.
Magnify button — We took the liberty of labeling this as “magnify” rather than “zoom” in order to avoid confusion, as this button has nothing to do with zooming the lens. This is for magnifying an image during playback, allowing you to see greater detail, which is often useful for ensuring the camera focused where you wanted it to. Some cameras even let you use this button to magnify a live-view image.
Delete button — Denoted by a universal trash can icon, pressing this button will let you delete a photo from your memory card during playback. Every manufacturer does it a bit differently, but it won’t ever be a one-touch process. You will have to press the button twice, or another button — like the OK button — afterward to confirm your decision.
Demagnify button — Again, we’re not calling this “zoom out.” This is the opposite of the aforementioned magnify button, but will also let you expand the playback view to show multiple image thumbnails at once. Some cameras will even let you pull back into folder or calendar views. This can be useful for quickly navigating through large image libraries, as modern memory cards can hold thousands of images. You’ll also notice that Nikon has a “?” next to the magnifying glass symbol. This button performs double duty as the help button; you can press it to see tips regarding a particular menu function.
And there you have it! Hopefully this overview has given you a clearer understanding of how the controls work on a modern camera with an interchangeable lens. These cameras often appear complex, but over time, all of this complexity fades away as you become more comfortable with the controls. There’s a good chance that many of these buttons will be used sparingly, too. As long as you know where the mode dial, command dial, and shutter release are located, you’re well on your way to mastering your camera.