
The PS4 has stolen the spotlight from the PS3, and it’s not long before PS5 will get all the attention. That’s still no reason to ditch your PS3 console or throw out your controllers quite yet. For gamers who enjoy playing on their PC, you can still get plenty of use out of your PS3 controllers.
Grab your controller, the PC you want to connect it to, a mini-USB cable, and we’ll walk you through the process.
Related content
- How to connect a PlayStation 4 controller to a PC
- How to connect a PlayStation 4 controller to a Mac
- How to connect an Xbox One controller to a PC
- How to connect an Xbox 360 controller to a PC
Part 1: Update Windows drivers and .NET Framework
Step 1: First, check your currently installed drivers by launching the Command Prompt. Once it’s open. type driverquery and press the Enter key.
Step 2: Scan the list and make sure you have these components installed:
- Microsoft .NET Framework 4.5
- Microsoft Visual C++ 2010 Redistributable Package
- Microsoft Visual C++ 2013 Runtime
- DirectX Runtime
- Xbox 360 Controller driver – for Windows 7 and older only

Step 3: Connect your PlayStation 3 controller to your PC using a Mini USB cable (aka Mini Type-B). Typically they have a USB-A connector on the PC side but you can find cables with USB-C connectors on Amazon. Mini USB is older and larger than the more-common Micro USB connector used on the PS4 controller, mobile devices, and more.
Windows should begin installing the initial drivers when you connect the cable.
Part 2: Download and install ScpToolkit and drivers
Step 1: Head to the official ScpToolkit download thread and click the green link to download the latest stable release. You’ll see the installer — ScpToolkit_Setup.exe — plus the source code packed in archives. If you want to tinker with the code, grab 7-Zip or a similar tool to extract the files.
Step 2: Locate and launch the downloaded installer as an administrator.
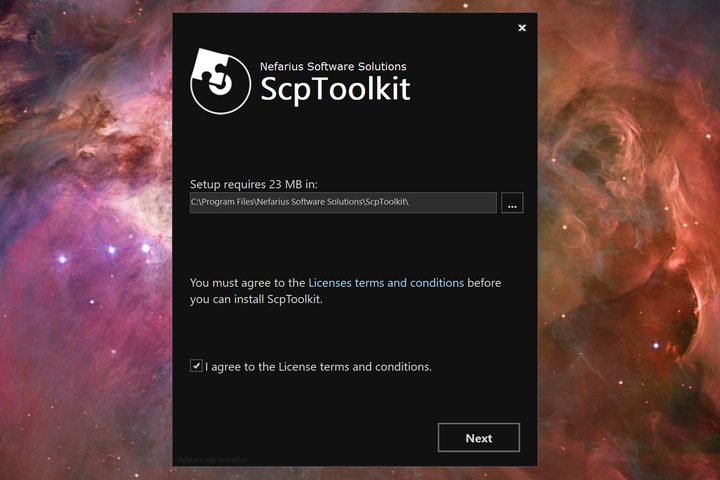
Step 3: Once installed, ScpToolkit prompts you to run a separate driver installer. If you don’t see this prompt, search for “Scp” and select ScpToolkit Driver Installer. On Windows 10, it may reside at the top of the Start Menu under Recently Added.

Step 4: With the ScpToolkit Driver Installer running, be sure all the boxes are checked, including Force Driver Installation.
Step 5: Click the boxed arrow next to the Choose DualShock 3 Controllers to Install option. On the resulting drop-down menu, find and select your DualShock 3 controller. If you also plan to use either a DualShock 4 or a Bluetooth dongle to enable wireless play, select those as well.
Step 6: When you’re ready, click Install. All the necessary files install and automatically configure. Don’t panic is you see loads of pop-up windows on your screen — that’s normal. Once you see the Dualshock 3 USB Driver Installed message, you’re good to go.

Step 7: Click the Exit button when the installation completes.
Your DualShock 3 is now plug-and-play, meaning you can plug it in at any time and it should work automatically!
Something to keep in mind: Since you’re technically using the Xbox 360 drivers to interact with the PS3 controller, games will likely display an Xbox control scheme. When a game wants you to “press X,” you’ll want to hit the Square button instead.
Note: As of January 2018, ScpToolkit is no longer in active development. Future Windows updates could make it an ineffective solution. As of now, though, it’s still a viable option.
Part 3: Create a profile and tweak settings
If you’re so inclined, you can fine-tune your PS3 controller through various applications included with the ScpToolkit.

Step 1: The “unstable” ScpToolkit Profile Manager does not install by default. To get this feature, run the installer again to select this tool and “modify” your current installation. You’ll then see a desktop shortcut and ScpToolkit Profile Manager added to the ScpToolkit folder on the Start Menu.
After you successfully finish that step, you can personalize button mappings and switch them out quickly. You can map keyboard and mouse commands as well.

Step 2: Click twice on the ScpToolkit Settings Manager shortcut that will appear on your desktop. You can also do this inside the ScpToolkit folder located on the Start Menu. Once you’ve double-clicked, you’ll be able to adjust your thumbstick sensitivity, rumble, controller latency, and LED display, plus a variety of other more advanced options.
Troubleshooting for Windows 10
When you try your hand at Windows 10 troubleshooting, you’re bound to stumble across many different barriers in your operating system, especially when you attempt to connect particular controls to your PC. Although there are plenty of Microsoft operating systems that adequately support Xbox accessories and Xbox Live environments, earlier versions of Sony hardware are more complicated when it comes to connecting this more modern technology.
Be aware that you may encounter a few obstacles and challenges during the installation process, even with ScpToolkit helping to prevent most problems. On the contrary, you can allow driver installs. We highly recommend that no matter what you do, you should regularly back up all of your data. Doing so will save a copy of your data so you can easily restore it if you run into a situation where you lose it.
Step 1: Select Start or hit the Windows key.
Step 2: Select the “gear” symbol on the left side of the Start Menu. You’ll see the Settings app appear. Step 3: Select Update and Security. 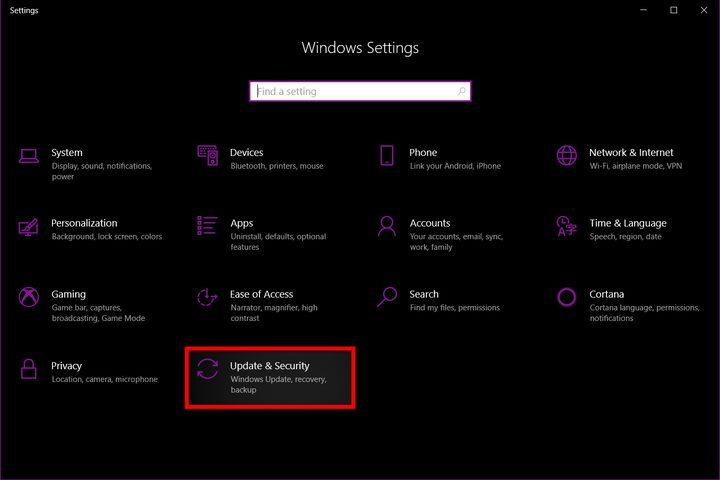
Step 4: Find and click Recovery from the list on the left-hand side.
Step 5: Select Restart Now (located underneath Advanced Startup)

Step 6: Your system will restart and come up in a mode that lets you change your firmware and startup settings, which will let you bypass the driver signature enforcement.
Step 7: You’ll see a menu of options appear. Click Troubleshoot.

Step 8: Click Advanced Options.

Step 9: Select Startup Settings. Your system will restart again.

Step 10: You’ll see another menu of choices after your system restarts. Locate Disable Driver Signature Enforcement, then hit the F7 key to restart your PC a final time.
Step 11: When your system restarts again, go through the instructions above to reinstall and configure ScpToolkit.


