
Continuity features on your Apple devices make tasks easier than ever.
You no longer have to send yourself photos or documents from your mobile device to work with them on MacOS. Using the Continuity Camera, you can capture photos or scan documents on your iPhone or iPad and have them appear immediately on your Mac.
Continuity Camera requirements and supported apps
You can use Continuity Camera as long as your Mac and iPhone or iPad meet the following requirements.
- The devices have both Wi-Fi and Bluetooth turned on and are near each other.
- You use iCloud and both devices are signed into it using the same Apple ID with two-factor authentication.
- The Mac is running MacOS Mojave or later.
- The iPhone is using iOS 14 or later.
- The iPad is using iPadOS 14 or later.
In addition, use one or more of the below Mac apps that support Continuity Camera.
- Finder
- Messages
- Notes
- TextEdit
- Pages 7.2 or later
- Numbers 5.2 or later
- Keynote 8.2 or later
Take a photo with Continuity Camera
Open one of the above supported applications on your Mac or choose a location on your desktop to add the photo. Be sure you have your iPhone or iPad handy.
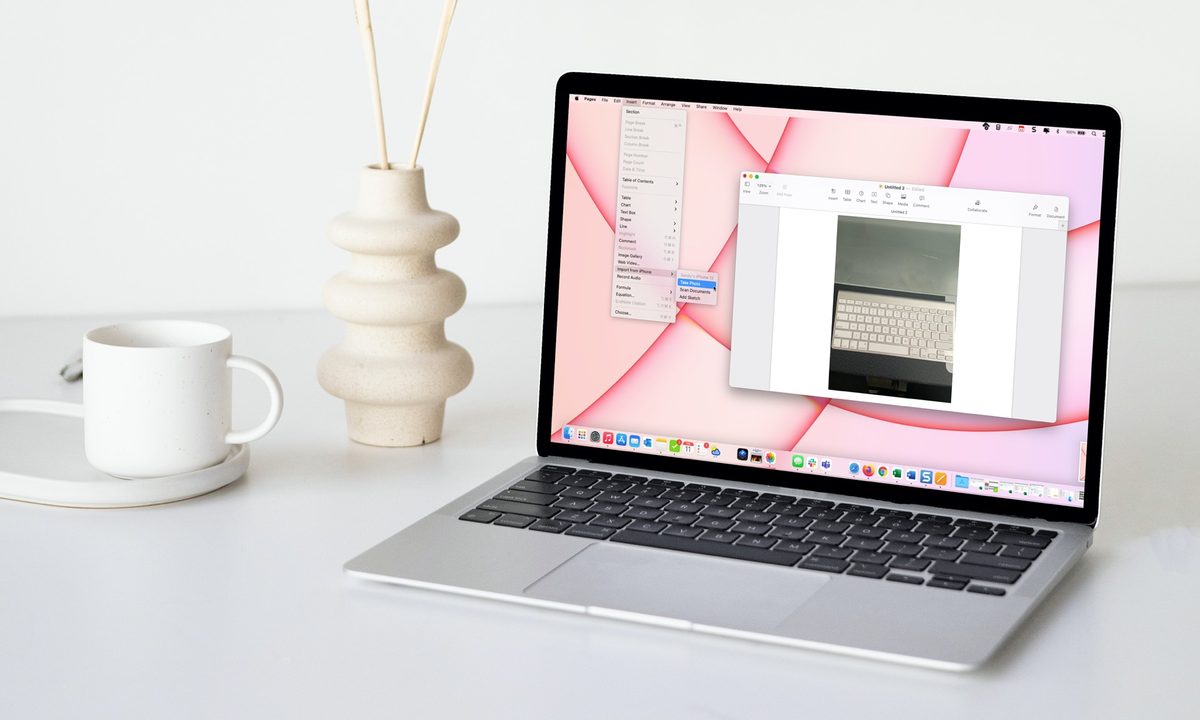
Step 1: Do one of the following to prompt the Continuity Camera, depending on the application you’re using:
- Right-click or hold Control and click the spot in the application or on your desktop where you want the photo. Select Insert from iPhone or iPad > Take Photo.
- Go to File or Insert in the menu bar and select Insert/Import from iPhone or iPad > Take Photo.
- Select the Media button the toolbar and pick Take Photo.
- In Finder, click the Action button in the toolbar and choose Insert from iPhone or iPad > Take Photo.

Step 2: You’ll see your iPhone or iPad screen open to the Camera app ready for you to take the photo. You can use the front facing camera or adjust the flash if necessary. Tap the capture button to snap your picture.
Step 3: If you’re happy with the photo, select Use Photo. You can also tap Retake to recapture the photo.


Step 4: The photo will then appear on your Mac in the application or location you selected.

Scan a document with Continuity Camera
You can also use Continuity Camera to scan a document and then immediately work with it on your Mac. Like above, open the application or choose the location on your desktop for the scanned image.
Step 1: Do one of the following to prompt the Continuity Camera:
- Right-click or hold Control and click the spot in the application or on your desktop where you want the photo. Select Insert from iPhone or iPad > Scan Documents.
- Go to File or Insert in the menu bar and select Insert/Import from iPhone or iPad > Scan Documents.
- Select the Media button the toolbar and pick Scan Documents.
- In Finder, click the Action button in the toolbar and choose Insert from iPhone or iPad > Scan Documents.

Step 2: When your iPhone or iPad screen opens to the Camera, place the document you want to scan in the frame.
Allow the app to scan the document automatically or tap the Capture button to scan it manually. Drag the corners or edges to fit the scan to the page or apply a filter if you like.
Step 3: When you’re done, you can scan additional documents or pages or tap Save to finish.


Step 4: The scanned document will appear on your Mac in the application or location you selected.

Popping photos you snap or documents you scan with your iPhone or iPad directly onto your Mac makes things just that much simpler.
Remember to check out other continuity features such as AirPlay for sending audio or video to other devices or Continuity Markup and Sketch for annotating or drawing between devices.


