
For a pretty penny, you can get a Mac with loads of storage — up to 8TB on certain models, in fact. But what if you have an old MacBook Air and you can’t even install Big Sur because it has an itty bitty 128GB drive? Why is that “other” category consuming so much space?
This guide shows you how to free up space on your Mac. Some of the instructions are rather simplistic, while others require a trip into the Terminal. We even suggest a few third-party alternatives if you don’t want to dig deep into MacOS.
Hopefully, by the end, your Mac will have a bit more room to breathe storage-wise. It may even have an extra spring in its step.
Clear browser data
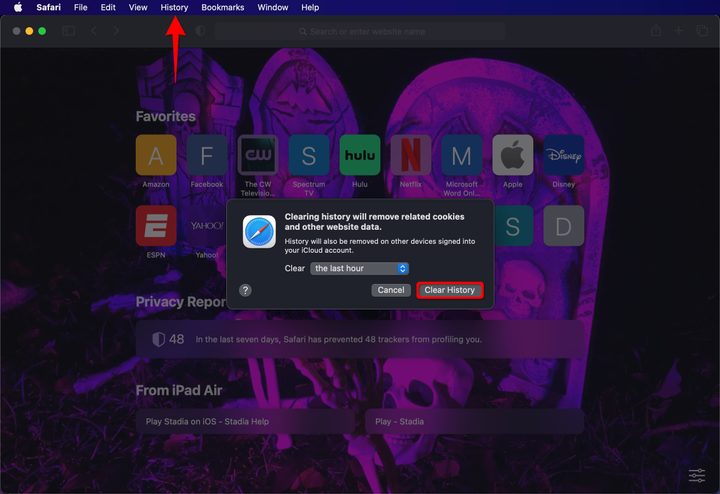
Web browsers download and store data like HTML files and images to display them on your screen. Typically, this cache remains on your Mac, especially with websites you frequent most. All browsers have tools to delete this data, but here’s how to do so in Safari:
Step 1: With Safari open, select History on the menu bar.
Step 2: Select Clear History on the drop-down menu.
Step 3: Click the Blue Arrows next to the Clear field and select The Last Hour, Today, Today and Yesterday, or All History on the drop-down menu.
Step 4: Click the Clear History button to finish.
Use the MacOS storage manager
MacOS provides integrated tools to help with storage management. Here’s how to access those tools:
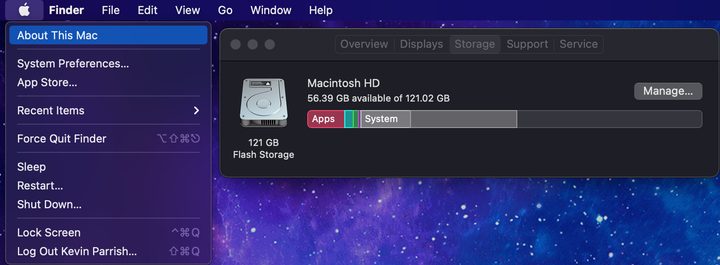
Step 1: Click the Apple icon displayed on the left end of the menu bar.
Step 2: Select the About This Mac option on the drop-down menu.
Step 3: Select the Storage tab in the pop-up window.
Wait for MacOS to calculate your storage. You’ll eventually see the capacity divided into several color-coded categories. Hover the mouse pointer over each category to get more detail. When you’re ready, move on to the next step.
Step 4: Click on the Manage button.
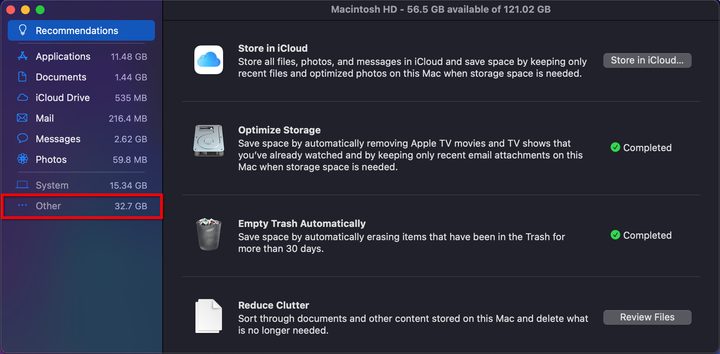
Step 5: On the following screen, click the Optimize button in the Optimize Storage section, if available. This deletes all watched TV shows and movies purchased through the Music and Apple TV apps. It also deletes old email attachments.
Step 6: Click the Turn On button in the Empty Trash Automatically section if you want the trash can to delete your discarded files immediately. Otherwise, files in the trash remain on your Mac’s drive for 30 days in case you change your mind.
Step 7: Click the Review Files button in the Reduce Clutter section. Here, you can sift through Applications, Documents, your iCloud Drive, Mail, Messages, and Photos to delete the files you don’t need to be stored locally on your Mac.
For instance, select the Applications category on the left, and a list of all apps appear on the right. Click the Size option to arrange the list in descending order from largest to smallest. This allows you to quickly free up space consumed by large, unwanted apps. Just select the app, and then click on the Delete button.
Anything you download falls under the Downloads tab in Documents. Messages can be a big culprit, too, storing images, movies, and so on locally on your Mac.
Manually delete music and music videos
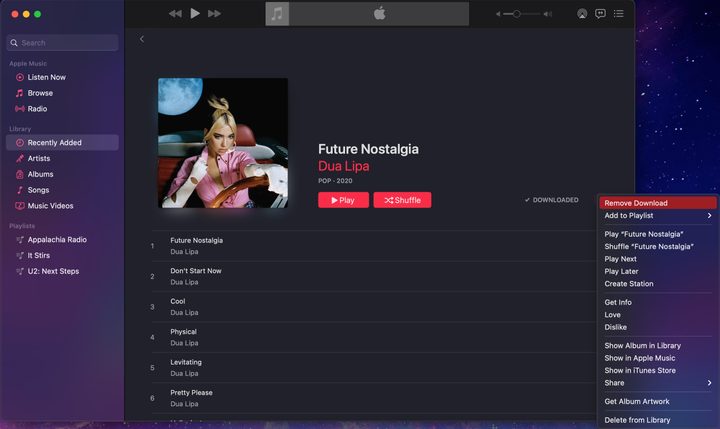
While Optimize Storage already does this in bulk, use the following instructions to delete specific albums, songs, and music videos while keeping others intact on your Mac.
Step 1: Open the Music app.
Step 2: Find the locally-stored music you want to remove from your Mac.
Step 3: Click the three-dot More button.
Step 4: Select the Remove Download option on the drop-down list. Do not select Delete from Library unless you no longer want to own the music.
Manually delete movies and TV shows
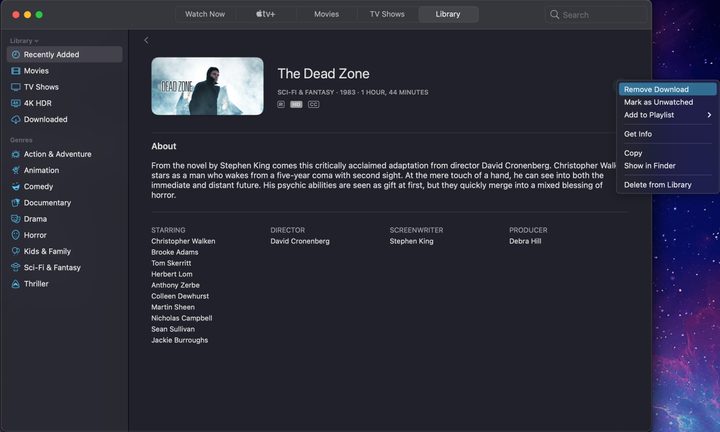
Again, Optimize Storage already does this in bulk. However, use the following instructions to delete specific movies and TV shows while keeping others intact on your Mac.
Step 1: Open the Apple TV app.
Step 2: Find the movie or TV show you want to remove from your Mac.
Step 3: Click the three-dot More icon.
Step 4: Select the Remove Download option on the drop-down list. Do not select Delete From Library unless you no longer want to own the media.
Manually delete downloaded files
Don’t forget to clean out this folder if you download a lot of files from outside Apple’s ecosystem.
Step 1: Open Finder.
Step 2: Select Downloads listed on the left.
Step 3: Right-click on the Download you want to delete, and select Move to Trash on the pop-up menu.
Step 4: Right-click on the Trash icon on the Dock and select Empty Trash on the pop-up menu.
Erase junk email
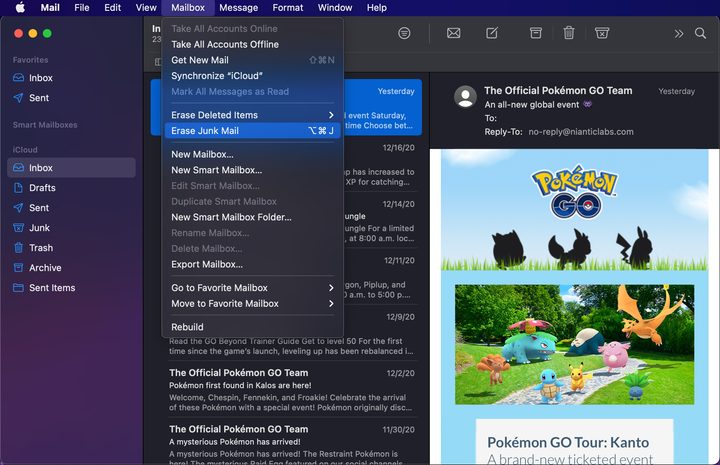
Your collection of emails and attachments can eat up your Mac’s storage, too. Here’s how to clean out Apple’s native Mail app:
Step 1: Open the Mail app.
Step 2: Select Mailbox listed on the menu bar.
Step 3: Select the Erase Junk Mail option on the drop-down menu.
Step 4: Select the Erase Deleted Items option on the drop-down menu followed by In All Accounts, On My Mac, or iCloud on the roll-out menu.
Clean out the “other” data
This one is tricky because MacOS places all data it can’t categorize under the “other” label. Determining what’s under this umbrella can be time-consuming. MacOS Sierra and newer do a better job at classifying these files, but you may find it may be larger than any other listed category. Problem is, you can’t directly access the contents in this category like you can with Applications or Documents.
Here are some examples of “other” files:
- Cache from apps you don’t use.
- Temporary files.
- Downloads that don’t fall under the typical categories.
- App plugins.
- Backups.
Remove cache folders

Apps, programs, and even MacOS store local files, aka cache. Typically, the older cache is not needed and can be safely removed. However, you’ll need to investigate what cache can go and what your Mac currently needs before going trigger happy with the delete function. Here’s where to find all the cache:
Step 1: Open Finder and select Go on the menu bar.
Step 2: Select the Go to Folder option on the drop-down menu.
Step 3: Type ~/Library/Caches in the text field and then click the Go button, as shown above.
Step 4: A list of files and folders appears. Right-click on the app folder you want to delete and select Move to Trash on the pop-up menu.
Step 5: Right-click on the Trash icon on the Dock and select Empty Trash on the pop-up menu.
Remove unnecessary Time Machine backups

MacOS will keep old Time Machine backups on your Mac. This can be problematic on devices with 128GB because the backups aren’t easily accessible and use a lot of space. You’re forced to use the Terminal and use commands to delete them individually. Here’s how:
Step 1: Open Finder and select Applications listed on the left.
Step 2: Double-click to open the Utilities folder.
Step 3: Double-click to open the Terminal app.
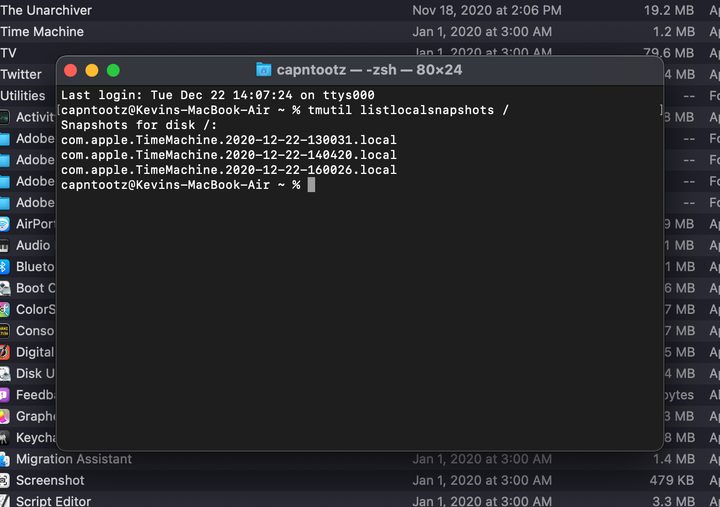
Step 4: Type the following command and then press the Return key:
tmutil listlocalsnapshots /
As shown above, you’ll see a list of local Time Machine snapshots stored on your Mac. These files start with com.apple.TimeMachine and include the capture date. The files end with the .local extension.
Step 5: Type the following command, add a space, and then enter the numerical sequence in the file’s name:
sudo tmutil deletelocalsnapshots[space][numerical sequence]
For example, the command may read sudo tmutil deletelocalsnapshots 2020-12-22-130031.
Step 6: Press the Return key.
Step 7: Repeat step 5 for all remaining Time Machine backups. When the commands are entered successfully, Terminal will respond with a Delete Local Snapshot message.
Remove additional unwanted files
Another long-winded way to delete unwanted files is to enter a file extension and list the associated files by size. This way, the largest ones appear at the top so you can quickly regain storage. Here’s how:
Step 1: At the desktop, press the Command + F keys simultaneously.
Step 2: In the pop-up window, next to Search, make sure This Mac is selected.
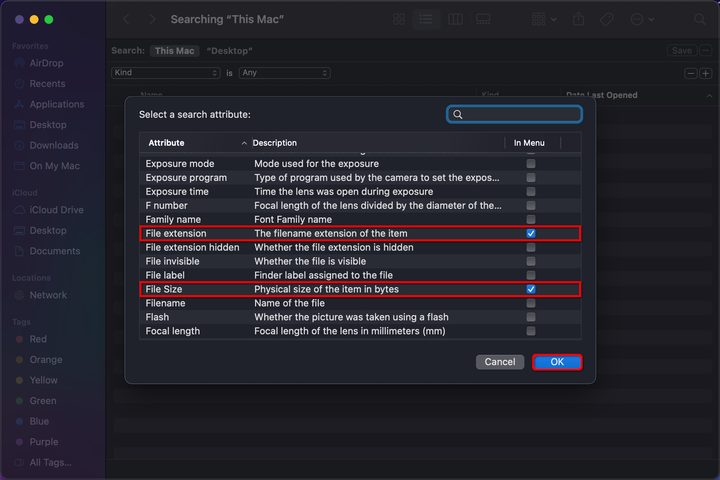
Step 3: Click the Arrows in the first search attribute field and select Other in the drop-down menu.
Step 4: In the following pop-up, check the box next to File Size and File Extension and then click the OK button.
Step 5: In the search field, enter a file extension to pull up a list of associated files, like PDF or MOV.
Step 6: Right-click on the File and select Move to Trash on the pop-up menu.
Step 7: Right-click on the Trash icon on the Dock and select Empty Trash on the pop-up menu.
Use third-party software
If you’d rather use a third-party solution to clean house, here are a few great options:
CCleaner: Originally developed for Windows, this MacOS version is an easy way to remove underlying junk files. The premium version adds real-time monitoring, automatic updates, and premium support for $20.
CleanMyMac X: The free version cleans up to 500MB. If you need to clear up additional space, the premium version starts at $35.
Disk Doctor: This utility costs a mere $3 and provides a simple toggle-style interface to easily decide what files you want it to delete, like application caches and logs.
Gemini 2: This app specifically hunts down duplicate files, which can eat up space. You can get this app for a one-time purchase of $48.95 or subscribe for $23.95 per year.


