
We’ve said it a lot: Hisense TVs (and especially the U7 line) offer some of the best bang for your buck. They are beautiful right out of the box. But they can be even better — more bright, more color-rich — with just a few tweaks to the TV’s picture settings.
As we’ve heard from manufacturers, most people don’t do anything to their TV after setting it up. It gets turned on and watched as-is. The picture will be great, sure, but by adjusting a few settings, it can be brilliant.
Turn off these default settings
The first order of business: Turn off a few settings.
You may have already tried to disable the Eco mode, but couldn’t find it in the Power settings. That’s because it’s not there. On a Hisense TV, it’s called Energy Saving.

To turn it off, start at the Home Screen. Press the Settings button on your remote, then navigate to Picture, then General, and then Picture Mode. Make sure that Energy Saving is not selected.

While in the Settings area, select your preferred Picture Mode. Of the options available, we recommend Theater Day, Theater Night, or Filmmaker Mode. The primary difference between the two theater modes is brightness, which can always be further adjusted.

Here’s another default setting to turn off: Intelligent Scene. This setting allows the TV to make adjustments based on the content on the screen. Go back to the General menu, navigate down to Intelligent Scene, and toggle it Off.
While in this menu, turn off Automatic Light Sensor. When enabled, this setting tends to do the job a little too well, and can significantly darken the screen based on the light in the room.
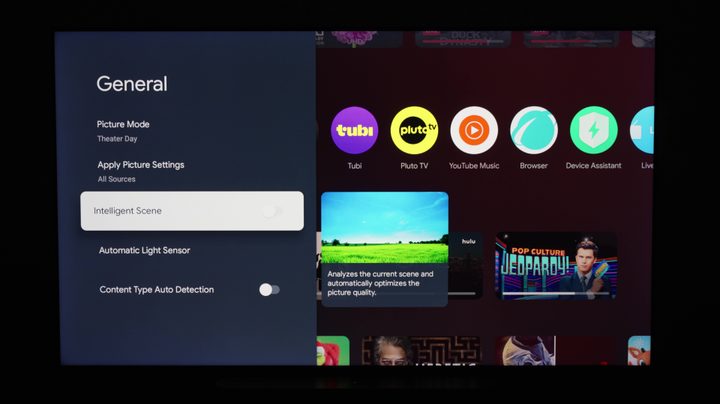
There’s one last default setting to switch off in this menu: Content Type Auto Detection. This automatically switches your TV into Filmmaker or IMAX Mode if it’s tagged as such in the content — like a movie or show on a streaming service. When Content Type Auto Detection is turned off, your TV will use the Picture Mode that you’ve set, instead of allowing the content to determine the mode.
Bigger, bolder brightness
You can also fine tune your Hisense TV’s brightness. You’ll likely be watching SDR (standard dynamic range) and HDR (high dynamic range) content so you’ll want to set the brightness for both ranges.
To set the brightness for SDR content, start on the Home Screen. Press the Settings button on your remote, navigate to Picture, and then Brightness. Here you can set the brightness to your liking. These settings will apply to all SDR content.

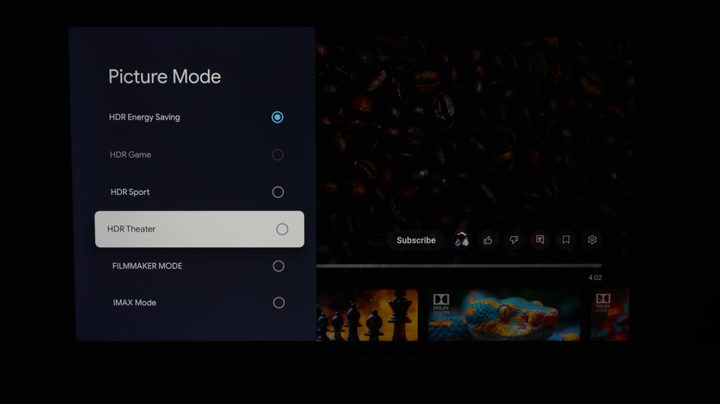
To set the brightness for HDR, start by playing some content — a show or movie — from a streaming service with HDR programming or a YouTube video (one of our favorites: Eugene Belsky’s channel). With the HDR content playing or paused, there are a few things to do. First, you may notice the picture is a little dark. The HDR picture mode is set to HDR Energy Saving by default. To make changes, press the Settings button, then Picture, then General, and then Picture Mode. Here you can change the Picture Mode to HDR Theater, Filmmaker Mode, or whatever your preference might be.
There are a few more settings tweaks that make your TV even brighter and punchier, which is especially nice for HDR content. Back in the Brightness menu, select Local Dimming. This setting controls the backlight brightness to get better overall contrast levels. Another way to think of it: It makes the brightest areas of your TV even brighter.
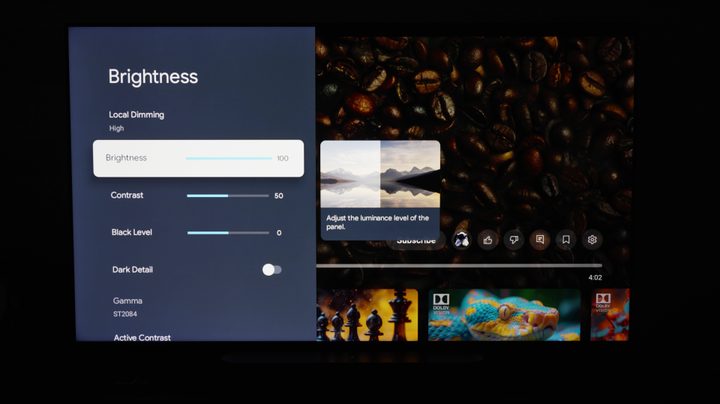
If you want the absolute best picture in HDR, set the Local Dimming to High and turn the brightness up to 100 — as long as it’s not too much for your eyes to handle.
Smoother viewing, device connection
With motion smoothing, it really comes down to personal preference. You might notice it, and you might not. If you do notice it, it’s hard to unsee.
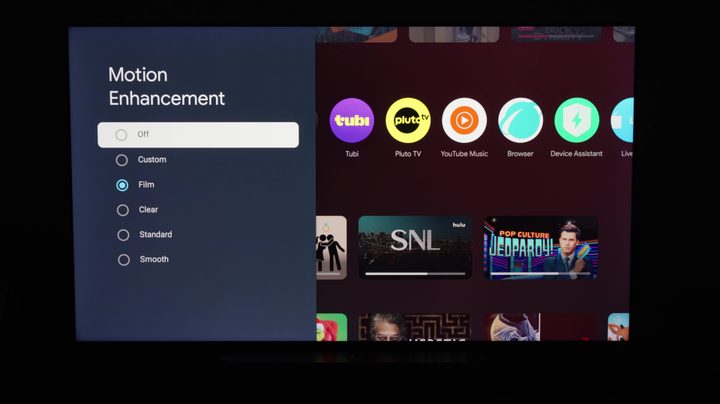
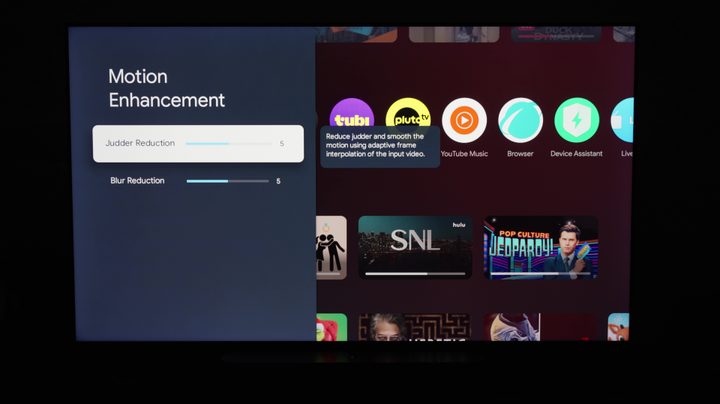
Here’s how to make adjustments. In the Picture menu, navigate down to Clarity, and then to Motion Enhancement. You can turn it off altogether or choose from several presets, including the Custom setting, which allows you to adjust Judder Reduction and Blur Reduction. Play around with different options to see what you like.
There are also a few settings that can make using your Hisense TV even easier.
If you have additional devices like a soundbar, Blu-ray player, or gaming system, you might want to control everything with one remote. To set that up, press the Settings button, then go to All Settings (cogwheel in the top corner of the screen), then to Channels & Inputs, and then Inputs. Here, make sure that HDMI Control is toggled On. There are additional options that allow you to automatically power your TV and compatible devices on and off together.
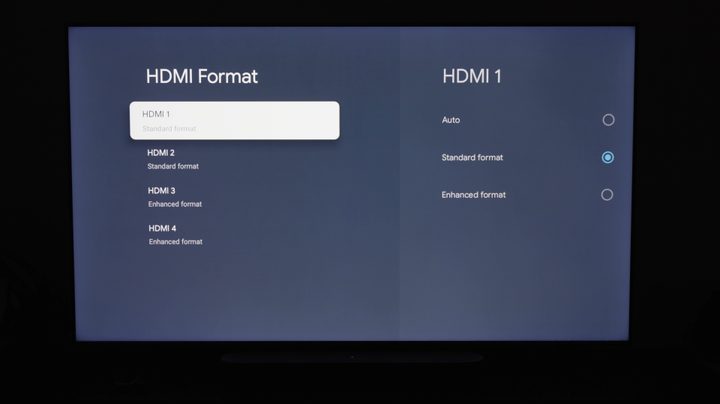
 Set the HDMI formats based on which devices are in which inputs. Under the Inputs menu, go to HDMI Format and make your choices accordingly. For gaming consoles that output high frame rates or 4K Blu-ray players, you’ll want to set the input to Enhanced Format.
These settings changes to picture quality will help set up your TV to deliver the best viewing experience, customized to your preferences. If you want to make additional or more detailed changes, you’ll now have a better understanding of where some of these options live and what it means to adjust them.
Have a different brand of TV and want to make similar adjustments? Most modern TVs have similar features to Hisense, however, they might be labelled differently, and it can get confusing. If you’re looking for LG, Samsung, Sony, TCL, or Panasonic, we have instructions for those, too.


