
It's easy to sync Mac content to an iPhone or iPad once you understand the process. While using AirDrop to transfer files to an iPhone and iPad from a Mac computer works and is quite familiar, repeatedly sharing collections of music, movies, TV shows, podcasts, and books can become tiresome when compared to automatic syncing.
Many MacOS users also use an iPhone or iPad since Apple designs its products to integrate together nicely. Life is a bit smoother when everything just works, but sometimes a bit of setup is required the first time around.
Whether using an iPhone, iPad, or iPod Touch, regular transfers might be best handled by syncing from a Mac.

How to connect a Mac to an iPhone via the USB port
In order to sync Mac content to an iPhone or iPad, you need to make a USB connection at least once. Afterward, you can choose to sync when first connecting over Wi-Fi or when the iPhone is plugged in via a USB cable.
Step 1: Connect the iPhone or iPad to the Mac using a USB cable. It's best to use the charging cable that came with the mobile device or an Apple MFi-certified cable to ensure a good connection. Older devices may need a Lightning cable but more recent iPhones and iPads require USB-C. A USB-A to USB-C adapter might be needed if the Mac doesn't have a USB-C port. After plugging in the iPhone, unlock it and choose Allow if the iPhone asks about granting access.
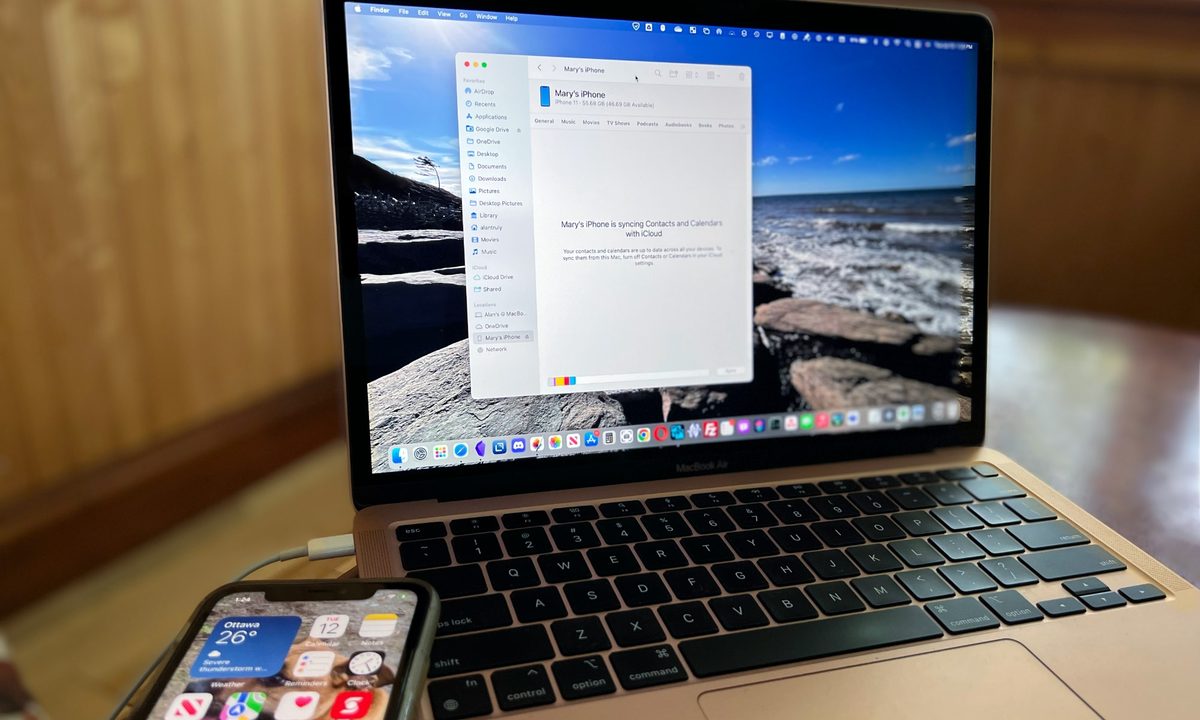
Step 2: Open a Finder window on the Mac and find the iPhone or iPad. It should appear in the sidebar at the left in the Locations section and will be named something similar to "Mary's iPhone." Select the iPhone location to open a panel of options.

How to connect a Mac to an iPhone wirelessly
The easiest way to sync content from a Mac computer to an iPhone is wirelessly over a Wi-Fi connection. The requirements are pretty simple. Both devices should be connected to the same Wi-Fi network. Any iPhone with iOS 5 or newer and any iPad running iPadOS will work. Wireless syncing requires a USB connection to a Mac in order to set it up and there is an option for automatic or manual synchronization. Follow the instructions above for connecting a USB cable, then continue below.
Enable Wi-Fi connection to the iPhone
Select the General tab then under Options, enable Show this iPhone when on Wi-Fi. After changing this setting, select the Apply button that appears at the bottom-right of the window. Afterward, the iPhone can be unplugged and it will still be visible in the Finder sidebar.

Sync Mac content to an iPhone
Whether connecting via USB or wirelessly, the process of syncing content from a Mac to an iPhone is handled the same way. You can select the iPhone from the sidebar of any Finder window, then select the type of sync, followed by the Sync button.
Step 1: Choose the type of content to sync. Tabs at the top allow syncing Music, Movies, TV Shows, Podcasts, Audiobooks, Books, Photos, and Info. There's also a Files tab but it is actually an immediate transfer, not really a sync. Every other tab has options to select whether to sync all media of that type or choose which are transferred. For example, the Music tab lets you sync the Entire Music Library or Selected artists, albums, genres, and playlists.

Step 2: You might have synced Photos, Info, and other media already via iCloud, and in that case there is no need for a cable to be connected to transfer files between an iPhone and a Mac. If you would prefer it, iCloud Photos can be switched off by opening System Preferences, going to the Apple ID pane, iCloud section, and disabling Photos.

Step 3: The final step is to start the synchronization process, which is done by clicking the Sync button located in the lower-right of the window on the Mac.

Step 4: It can be useful to check the box on the General tab that allows the Mac to Automatically sync when this iPhone is connected. It does exactly what it sounds like: synchronizing content from the Mac to the iPhone when it is first connected. With a wireless connection, this would only happen if the iPhone moved out of range of the Wi-Fi network and then reconnected later.

Troubleshooting USB connections
If the iPhone doesn't appear in the Finder sidebar when connected, the first thing to try is to simply disconnect and reconnect the iPhone. Make sure the iPhone is unlocked and Allow access on the iPhone if asked. The Locations section should appear in the Finder sidebar but if it isn't seen, enable it in Finder preferences by checking the box beside CDs, DVDs, and iOS Devices.

Use caution when deleting synchronized items from a Mac
An important note about synchronized files is that deleting an item from the Mac repeats that action on every other device the next time they sync. Deleted files are moved to the Mac's Trash and can be recovered if there was an accidental deletion, although not if you have emptied the Mac's Trash. Another sync will be required to restore recovered files to an iPhone.
Syncing versus iCloud
It's also possible to transfer media by using Apple's iCloud online storage. That means content from the Mac gets uploaded to the internet and downloaded to any iPhone and iPad that's logged in with the same Apple ID and has iCloud Drive enabled. It's quite simple to set up with just a few clicks but there is a drawback. Since iCloud only comes with 5 gigabytes of free storage, it's easy to exceed this amount at which time, you'd need a subscription to store anything else.
iCloud Photos also count toward the storage limit so to reduce monthly costs, syncing directly with a computer is a much better option since it's completely free no matter how much content is shared between devices. Keep in mind that as you edit pictures in Photos on Mac, you add to your storage limit.
Syncing to iPad and iPod Touch
The iPhone and iPad share a very similar operating system, and the process used to synchronize content from a Mac computer is the same regardless of which of these mobile devices is being used. An iPhone or iPod Touch can be plugged in with a Lightning cable and some iPad models use a USB-C cable. Beyond that, a wired connection works the same way. Wireless transfers are the same for any of these devices and the Mac computer manages the connection in each case.
Syncing content from a Mac to an iPhone or iPad is quite simple after the initial setup and takes the hassle out of keeping the same files across multiple devices. It also eliminates the need to store this data in iCloud or other cloud storage which can add to subscription costs.
If you need more space on your computer, it's a good idea to learn how to format and use SD cards on Mac.


